The final production came out brilliantly, I feel it is simple but that is what we need as people have a limited time to take it in. The video starts with curtains similar to what would be seen on the stage, reflecting its distant past. It then asks if the driver wants a good time and some "E's" all in slang language and using smilies. This reflects its most present usage. Next it goes on to show an RSS feed from the www.thisisplymouth.co.uk website, which will show any article which has the theme of the Dance Academy on the screen, 95% of which are about the drug bust and uncertain future of the Dance Academy, this would of course be updated automatically if there is a new story about the building.
One problem I did have with the presentation was the lack of colour and also the speed the stories go at, but this is because there are so many to show in such little time and the observer can make out enough to know what it is about. I suppose this also gives the factor of wanting to return to try and read the parts you missed but it would have been better if it was a little bit slower IMO.
Overall I think it was a great success and our group worked together really well! =]
Some pictures of us working with Arduino, we got started quite slowly with the coding of Arduino, but we've had a strong idea for some time, we have just been perfecting it! Now we need to turn that idea into a reality...
First thing was to get our hands on an Arduino board along with some adapter shields and sensors, we had a fiddle in one session and coded a nifty little light sensor linked up a LDR sensor. This was actually fundamental to our project as it is reliant on recognising whether the sensor is seeing light or not. When the code changed from 0 to 1 (i.e no light to light) the light went from on to off! This means a big chunk of our project is ready to go, we just need to get working on the fartotrom!
We now need to link it up to the fart machine, the machine will still fart but will also play a quicktime video when the sensor is exposed to light. This reflects the exposure to light it will receive when the light changes to red. The time the cars will be stopped and people will have nothing to look at but the projection.
Here is a picture of the complex set of Arduinos, shields and sensors to make a light sensor. Jon perfecting the code!
This project, found on YouTube shows how to turn an Arduino micro-controller into sensor of invisible electromagnetic fields using simple wire, a resistor, and an LED.
Aaron ALAI's EMF detector project is awesomely simple to make and fun to use. An upgraded version can be built using an LED bar-graph for more 'meter-like' functionality.
This project is really really cool and would be a great way for someone to find where they are wasting electricity in their house in a fun and easy way. This doesn't really relate to our Stonehouse project but goes to show the possibilities of Arduino are really wide ranging. I might even give this a go in my own time when the project is completed!
The Code...
As you can see the code is really simple to do as well, showing how accessable arduino is to anyone with a little bit of knowledge... compared to say... JAVA! -.-
EMF Detector Averaging Code // Aaron ALAI EMF Detector May 28th 2009 VERSION 1.1 // aaronalai1@gmail.com // contains code for averaging sensor data
#define sample 300 //this is how many samples the device takes per reading //more information for #define http://arduino.cc/en/Reference/Define int inPin = 5; //analog 5 float val; //where to store info from analog 5 int pin11 = 11; //output of red led
int array1[sample]; //creates an array with number of elements equal to "sample" //more information about arrays http://arduino.cc/en/Reference/Array
unsigned long averaging; //the program uses this variable to store the sum of each array it makes
void setup() {
Serial.begin(9600);
}
void loop() {
for(int i = 0; i < averaging =" averaging" val =" averaging" val =" constrain(val," val =" map(val," averaging =" 0;" inpin =" 5;" pin11 =" 11;" i =" 0;" averaging =" averaging" val =" averaging" val =" constrain(val," val =" map(val," averaging =" 0;" inpin =" 5;" pin11 =" 11;" i =" 0;" averaging =" averaging" val =" averaging" val =" constrain(val," val =" map(val," averaging =" 0;"
Instead of chaining multiple guitar effects in search of a new sound, the maker of this video decided to mod just one. Using an Arduino microcontroller board + digi-pot chip, he was able to add a variable gating effect to a fuzz pedal.
This helicopter game is made using arduino, and is similar to the popular copter game online, the refresh rate is a bit slow but the game is simple and engaging.
/** * Helicopter Game v0.1 * By Dave de Fijter * Free to use and abuse :) * * Uses the ks0108 library from the arduino playground: * http://www.arduino.cc/playground/Code/GLCDks0108 */
int position = 5; // Initial y-position of the helicopter unsigned int screenwidth = 128; // The width of the screen in pixels (duh) unsigned int screenheight = 64; // The height of the screen in pixels (duh) unsigned int playerwidth = 10; // The width of the helicopter sprite unsigned int playerheight = 5; // The height of the helicopter sprite unsigned int max_position; // The maximum y-position of the helicopter unsigned int buttonPin = 12; // The arduino pin number of the play-button unsigned long xpos = 1; // The x-position of the helicopter ;) unsigned int iters = 0; // Block iterations, also represents your score boolean running = true; // Flag that marks if the game is running or not unsigned int ry; // The y location of the current block to avoid unsigned int minblock = 19; // Minimum size unsigned int blocksize = 19; // The startsize of the blocks unsigned int maxblock = 30; // The maximum size of a block; increase for more difficulty
void setup() {
// Reset the defaults because we wan't te reset the game after a game over running = true; xpos = 1; iters = 0; position = 5; blocksize = 19;
// If the button is hold invert the screen, otherwise play it like it's normal pinMode(buttonPin, INPUT); if(digitalRead(buttonPin) == LOW) { GLCD.Init(INVERTED); } else { GLCD.Init(NON_INVERTED); } GLCD.ClearScreen();
// Calculate the maximum y position of the helicopter max_position = screenheight - playerheight - 2; // Show the introduction screen intro(); // Seed the random generator from the unused analog 5 input (noise) randomSeed(analogRead(5)); }
void intro() { // Draw the introtext and wait for a second before starting the game GLCD.ClearScreen(); GLCD.SelectFont(Arial_14); GLCD.GotoXY(40, 26); GLCD.Puts("HeliGame"); delay(1000); GLCD.ClearScreen(); DrawScene(); }
void DrawPlayer(int y) { // Remove the last helicopter and draw a new one on the given y position :)
GLCD.FillRect(0, position, 10, 5, WHITE); // Clear the last heli GLCD.DrawLine(1, y, 8, y, BLACK); // X,Y,X,Y, BLACK if(xpos % 3 == 0) { GLCD.SetDot(2, y, WHITE); GLCD.SetDot(4, y, WHITE); GLCD.SetDot(6, y, WHITE); } GLCD.SetDot(5, y + 1, BLACK); GLCD.SetDot(1, y + 2, BLACK); GLCD.DrawLine(4, y + 2, 7, y + 2, BLACK); GLCD.DrawLine(1, y + 3, 4, y + 3, BLACK); GLCD.SetDot(8, y + 3, BLACK); GLCD.DrawLine(4, y + 4, 7, y + 4, BLACK); position = y; }
void GameOver() { // Shop this screen when it's a "Game Over" // Delay for a sec after that so the reset won't get triggered by accident // After that second the game can be reset // Hold the button for a while for "night" modus ;) GLCD.ClearScreen(); delay(10); GLCD.SelectFont(Arial_14); GLCD.GotoXY(32, 26); GLCD.Puts("Game Over"); GLCD.SelectFont(System5x7); GLCD.GotoXY(58, 40); GLCD.PrintNumber(iters); running = false; delay(1000); }
void Blocks(int x) { // Draw the blocks to avoid; // Sorry, only one at a time ;) if(x / screenwidth > 0) { if(x % screenwidth == 0) { //GLCD.ClearScreen(); GLCD.FillRect(0, 1, screenwidth -1, screenheight - 3, WHITE); ry = random(1, screenheight - (blocksize + 2)); iters++; } int rt = screenwidth - (x % screenwidth) - 10; int rto = screenwidth - (xpos % screenwidth) - 10; if(rto >= 0) { GLCD.FillRect(rto, ry, 9, blocksize, WHITE); } if(rt >= 0) { GLCD.FillRect(rt, ry, 9, blocksize, BLACK); }
if(rt <>= ry && position <= (ry + blocksize)) { // collide GameOver(); } } } xpos = x; } void DrawScene() { // Draw the initial scenery GLCD.DrawLine(0, 0, screenwidth - 1, 0, BLACK); GLCD.DrawLine(0, screenheight - 1, screenwidth - 1, screenheight - 1, BLACK); GLCD.SelectFont(System5x7); } void loop() { // Game code; run the main loop if the game is running; // Otherwise check the button state for a game reset if(running) { if(digitalRead(buttonPin) == LOW) { // Go Up DrawPlayer(position - 1); } else { // Go Down DrawPlayer(position + 1); } GLCD.FillRect(100, 4, 26, 7, WHITE); GLCD.GotoXY(100, 4); GLCD.PrintNumber(iters); Blocks(xpos + 1); // Check for status if(position <> max_position) { GameOver(); }
Now we have been shown arduino and what we can do with it we are defiantly looking into using the Stonehouse work we have been working on all first term but just implementing it in different ways to make use of the arduino boards. We are still looking to have a projection but are now looking more towards projecting it onto the road as our previous research showed that this would probably have the most impact and be viewed by the most people. Therefore we are looking into different ways to project it.
One idea we have is to use sound, every the arduino board is triggered by a certain amount of DB a projection would be started, to do this we could use Arduino to build a audio sensor similar to the one shown HERE the problem with thisis that the sound could be caused by other things, such as birds, or music from the clubs on Union Street, sound also means the car is passing so the animation will put off the drivers and we could be in trouble with the police!
For this idea I had a look at some code and what Aduino boards we needed.
The brick consists of a high sensitivity microphone and onboard Low Voltage Audio Power Amplifier. These measure the amplitude of sound in the environment. This data can then be used to start the effects on the screen, so in my case the storm starting on the screen.
The code for this would be very simple, it would just be a matter of telling the Arduino sensor that when the audio level reaches a certain level (eg 10DB so that normal ambient sounds do not effect the game) the animation starts.
I have written up a code for a device to display sound levels with Arduino but not to do anything with them, this would be the part I'd need with the device.
void serialEvent(Serial myPort) { // read the serial buffer: String myString = myPort.readStringUntil(linefeed);
// if you got any bytes other than the linefeed: if (myString != null) {
myString = trim(myString); //println(myString); // split the string at the commas // and convert the sections into integers: int sensors[] = int(split(myString, ‘,’));
// print out the values you got: for (int sensorNum = 0; sensorNum < sensors.length; sensorNum++) { //print(“Sensor ” + sensorNum + “: ” + sensors[sensorNum] + “\n”);
void keyPressed(){ if(key==’s’) saveFrame(“sound-######.png”); } //------------ end of code
Therefore we are now looking into the idea of using light sensors on the traffic lights, which when they turn red turn a switch (eg a 0 to a 1) and starts the video, the problem with this is that wireless receivers for Arduino are quite expensive, we are therefore looking into some solutions to this.
*Update*
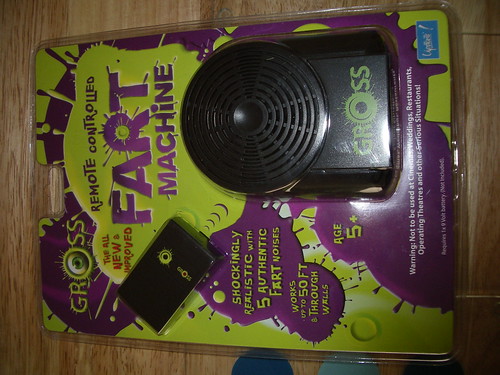
Jon has come up with a great idea of using a fart machine as a wireless sensor, with a range of over 50 ft it would be perfect, whilst we were in NYC Jon started work with the machine, testing the range of it as a light sensor, now we just need to link that to the video somehow!
personally my favorite is this RRS link which could be used in some way in the video, and be updated if there is any news about the club automatically. We'd just need to find a way to make it automatically update
So finally after so much talk about them we are finally going to be playing about with Arduino Boards
"Arduino is an open-source electronics prototyping platform based on flexible, easy-to-use hardware and software. It's intended for artists, designers, hobbyists, and anyone interested in creating interactive objects or environments.
Arduino can sense the environment by receiving input from a variety of sensors and can affect its surroundings by controlling lights, motors, and other actuators. The microcontroller on the board is programmed using the Arduino programming language (based on Wiring) and the Arduino development environment (based on Processing). Arduino projects can be stand-alone or they can communicate with software on running on a computer (e.g. Flash, Processing, MaxMSP).
The boards can be built by hand or purchased preassembled; the software can be downloaded for free. The hardware reference designs (CAD files) are available under an open-source license, you are free to adapt them to your needs.
Arduino received an Honorary Mention in the Digital Communities section of the 2006 Ars Electronica Prix. The Arduino team is: Massimo Banzi, David Cuartielles, Tom Igoe, Gianluca Martino, and David Mellis." - Arduino
We had a look at this tutorial:
http://www.arduino.cc/en/Tutorial/PhysicalPixel
After our first look at Arduino I feel this technology would help our project greatly, we had a lot of ideas for our visual aspects but not how to make transitions, with Arduino we can use the traffic lights changing as the cue for the change. We are thinking of doing this by using an Arduino board with a light sensor to do this, every time the lights change red the animation begins.
Another way that was suggested was to use a wireless mouse and instead of a click action on the left mouse button we will use a light sensor. Every time the light turns red the mouse “clicks” a play button that starts the animation. Whilst this is good in theory as the use of a wireless mouse would mean we’d need the sensor near to the computer that gets clicked which probably isn’t viable.One way to get around this would be to use a wired mouse with extensions, the problem with this is that they could get disconnected or cut by passers or be effected by the weather by which would end the project.
The following video shows an interactive installation that creates a cool real time interactive projection on a huge scale, the maker of this project said that they aimed to "create an installation that would go beyond merely projection on buildings and allow viewers to become performers, by taking their body movements and amplifying them 5 stories tall." The idea of tracking peoples movement and projecting them is something that is very interesting, I don't think it would really work in Stonehouse as the main traffic through the area is cars not people but in a pedestrianised area such as Cornwall Street or the University this could work very well. A good place this could be projected is either the Council building in the town centre or one of the university buildings.
After doing our project I've been looking into other GPS drawings people have done, the first I found was known as "the Biggest Drawing in the World' It was however fabricated but the idea was solid. Below is a brief description of the project.
The finished "GPS" Drawing Other smaller projects of a similar style have however been ligitimitly completed. Below are a few examples from GPSDrawing.com
Location: Edmunds Park, Didcot, Oxfordshire Dates: 10/5/02 Track Length: 3.17 km Average Speed: 4.8 km/h Method: Shanks's Pony Credits: Hugh Pryor
GPS Drawing over Europe made with five consecutive Ryanair flights 5414 miles in 68 hours for £74 from London Stansted airport to London Stansted airport.
With this inspiration I have decided to use Google Latitude to create my own GPS Drawings of my trip home from Plymouth to Southampton, then to Wolverhampton then back to Plymouth. I may try to make a picture along the way but I just want to test out the technology.
Jon has made an awesome mushroom style cloud of union streets wifi signals. Below is his description of what's going down with this colourful creation...
Using the hertzian space visualisation I created of Union Street, using a WiFi enabled phone, as a basis and guide, I have created this image mixing the thermal imaging technique to represent the WiFi hotspots. The areas of red are where the signals are strong, and the white bright areas are where the signals are most concentrated. The reverse is also true with the blues and greens being the weaker edges of the signals.
Sir Jonathan Moore - 2010
Wednesday, January 27, 2010
For this part of the project we have been asked to work with Hertzian space, last year the second years did a similar project but as I was on a different course so it was my first encounter with it. Radio space, even through our senses detect only a tiny part, it is all around us at many different frequencies, we use some of these frequencies for things that we take for granted every day such as Bluetooth, FM radio, Television etc. But the majority of these aren’t. The table below shows all the different types of radio frequencies.
The Electromagnetic spectrum
The Plan We are going to be using Google’s Latatude, a location-aware mobile app developed by Google. Latitude allows a mobile phone user to allow certain people to track their location. Luke Mears and myself installed the application on our smartphones and both of us had varying success with the application, my first marker was ironically somewhere in Stonehouse, when I was in room 213 in Babbage, it didn’t get much better for me throughout the day! Luke’s however worked great and we got a good set of GPS coordinates. The coordinates we gained were gained by following a set of rules we set ourselves. The rules were to follow a group (3 or more) of male young adults, then change to a group of mixed young adults when their path intersects ours, and then swap to a group of female young adults when their path intersects ours, before going back to the beginning using the same rules. We did this for about 45 minutes and got as far as the Barbican before turning around and returning to the University.
Above are the results of our journey on a graph made on the Internet and below are the results of Jon and Luke’s designs for the GPS results.
Below are my versions, I decided to go with musical notes along the routes we took, this was because all of the groups we followed had some element of music playing, for example the first group had headphones in, the second had a mobile phone they were listening to and the third group had a phone which went off and played a song. The first musical note follows the path we went and the second one is on an anomaly on the GPS and the stars are GPS points that are outside of the note.
The second is more simple, each colour represents the different route we took following each group of people. Black shows when we weren't following anyone.
Our idea has now progressed into using an effect called mise en abime, this simply means into the abyss or placing into infinity. To perform this technique on our wall we are going to film the projection from the van the projector is in, we will then project that onto the projection to give a never ending void effect, this will give the image a depth that will make the area look like it could actually be a window. The effect is similar to one one seen when two mirrors are faced towards one and other with a never ending repetitive image, going into the visible distance. Luke Mears has practiced this effect using a webcam on his computer screen, see below, I think the effect works well and is extremely simple to perform.
I believe this effect makes the building appear empty, and possibly like a blackhole, sucking in the surrounding area, this metaphor works well for the stonehouse area as everything around it seems to be run down and broken.
To change from the "good" to the "bad" we are going to have to have something that changes it, we'd previously discussed using sound levels, but we are now going to use a website questionare. This idea is similar to the website for the dutch sculpture shown to us by Shaun, which changes colour when local issues are raised on the sculptures website. We now need to have a meeting to decide the questions we will have on the website, how it will effect the feed and how are we going to promote the website around the area. Shot-codes could be a possiblity however the site isn't very well known and I feel we should use a website that the locals of stonehouse are more likely to use. Another idea would be to do some guerrilla advertising or use facebook to create an event and invite local people to it using already existing local groups such as the Plymouth page.
Sunday, December 6, 2009
I have found a pretty cool image effect on the internet which would be a nice effect for our projection, it seems to have been made pretty simply using shadow effects and two pictures to give the effect of time passing. I feel this effect would give a seemless transition between the images, also I just think its cool!
Below is a test projection I made with my other group members today using After Effects. The content isn't really what we'd have but the cabaret image is there to represent a "good" image, whilst the old operating theature represents a "bad" image. We are planning on using a feed with our projection which will make the projection change with the change of status in said feed. We'd like the feed to be related to the traffic passing the Dance Academy, as this is the main way people pass our location. Sound could also come into this as the traffic is also the main sound in the area. Shaun has given us an idea of using slow shutter speed images to show the passing of time, we all feel this is a great idea and will be perusing this idea soon.
Whilst on the internet I found the following website and thought it related quite well to our project, I feel that the way the house has been built means people can persevere why it looks so strange in different ways. I think that that would be a good idea for our projection, clearly we cannot change the building physically but if we were try to project onto an unusual area which looks different from different perspectives.
Today our group all went down to Stonehouse to take some measurements of dance academy. We found some good places to project upon, one on the side of the building, in a boarded window and one in a door at the front, the both of these are visible to the public and are places a van could get to to project from. We took measurements, of the locations and probable distances to project from as well as photographs, and also a 15 minute survey of the volume of buses, cars, people, bikes etc from various points at the same time. The results of all of these are posted below. Our next step is to see if this is viable with the projector available. In a 15 minute period:
People at bus shelter/opposite restaurants = 12 people/1 bus
Here is the map which Shaun sent us in an email. I feel its a lot like our map, and even works in a similar way to mine except mine used coloured areas rather than lines. It also uses a key similar to ours.
Shaun has set us the task of creating a postcard, which has been taken in the future in the Stonehouse area. The image should in someway reflect our ideas on what we want to do with our Stonehouse project.
I am going to take some photographs in the Stonehouse area before I think about what to do with them. I am going to take a set in the day and in the night in the Union Street area, and focus around the area of The Dance Academy. I feel having a contrast between day and night will show how the atmosphere of the area changes between the two times of day.
I want to take pictures of the architecture of the area as this is the main feature we want to change, I am going to try to find buildings which have large flat surfaces as we are looking to make projections onto buildings in the area. I am going to take normal photos of the buildings but try the least amount of other factors in as this makes it easier when I come to Photoshop the images.
Nightshots
As you can see, the night shots came out quite poorly, this is because there was a lot of rain and I had to use a slow shutter and flash, which meant the rain can been seen quite a lot. The night shots have a lot of neon lights in them, but as you can see the area is also very industrial with very little signs of life other than the odd person and passing traffic.
Everyone in the area seems to be passing though and noone is stopping. Barely anyone even noticed me taking photos in the area. The photos are taken around 8 - 9PM which is too early to see the drunken revelers falling out of clubs, I feel the main people in the area will probably be people associated with the nightlife of Stonehouse (clubs, pubs, late night take-away, strip-clubs, adult book shops etc).
The atmosphere in the area is very unwelcoming, I felt very out of place around Stonehouse, and there isn't anything in the area to make anyone feel any differently. The lighting is very dull which gives the streets a foreboding feel. I think that our illuminations on the buildings would help combat this a lot. It would also make people stop and look around the area.
We could have small illuminations in harder to find areas which mean people explore Stonehouse. I feel using warm and inviting colours such as orange, reds and yellows will help improve the moods of people in the area too. It will also give the area a warm feel, which it lacks due to its close proximity to the sea.
Dayshots
As you can see from the day shots, the area still has a very untidy look. The feel of the area is slightly different however. People are visiting Stonehouse to shop in the supermarket (Aldi) eating in the fast food restaurant (KFC) and taking their cars to the garage (Kwik Fit). There isn't really anyone in the area just walking around however. Everyone is getting their tasks done then driving off in their cars.
This shows the area does need to be made more pedestrian friendly. Walking around the area, it was clear there was very little appreciation of the history, people had graffiti-ed all over the old dance academy, there was also litter and dog mess around which isn't really seen in the town centre, just a few hundred yards up the street in the Town centre.
I feel that the area needs something different in the day time, as the projections won't be visible in the day.
For my postcard I think I'm going to use the idea I had about the garden in the deserted areas of Stonehouse along with a picture of one of the buildings with a projection on it. I feel this will show the main features we want to add to Stonehouse. I am going to photoshop both images to look futuristic and generally more tidy.
I have now made both the postcard images, they don't however look very good together, therefore I am making two postcards. I am basing them both on the 2012 olympics, which is when I feel the area will need renovation.
This is how I have perceived the other symbols in the joint picture, I have worked this out from the colours, shapes and positions of the symbols.
Friday, October 16, 2009
Looking around the Stonehouse area we have decided to go with working mainly upon Union Street, this area has a grand history originally one of the main, and richest parts of Plymouth. The area has now fallen greatly, becoming a main area for anti-social behavior, such as drinking, gambling and also strip clubs. With this the history of the area has been all but lost, with our project we hope to revitalise Stonehouse and bring back much of its former grandour. Buildings such as Malthouse and Dance Academy have been uninhabited (other than by homeless people) for many years and have little hope of referbishment. The Dance Academy is actually a Victorian listed building, and is on the list of most in danger listed buildings in the UK. In areas where the old buildings have gotten into such a bad condition they had to be pulled down there has been no new development as the area is so undesireable. These areas have been left clear for so long that they have in fact started to grow trees and shrubary.
This is very ironic as the growth is there as a direct cause of the lack of archutectural and cultural growth on union street. I feel that greenery would actually benifit the area and possibly instead of keeping these dead zones closed off, they should be cleaned up, replanted and opened up, creating a small park for the area. The group has decided to go with the idea of projections on buildings as our idea. We feel that projecting '3D' images of Stonehouses history on new buildings will help renovate the area. The light it will produce will make people want to visit the area and stop when passing through to view the illuminations.
Below is a video which shows the sort of projections I feel the group would like to get, whilst they may not be actual projections and instead made in a program like After Effects I believe the idea is achievable.
Now I've made my map of Stonehouse I am going to go around the area to look around and see if my predictions from the Google earth map reflect what the area is really like. This building was actually in the red area of the map. If I'd seen this building before I may have reconsidered the borders of my zones. This is in the yellow area of the map, whilst this isolated area does look nice, the rest of the area is houses and small factories so I feel this overall is accurate.
All of the following pictures are in the green area, I feel the majority match how I had pictured this area of Stonehouse, there was lots of interesting architecture, and the whole area seemed very well maintained and litter free. The people who were around the area were mainly residents but there were some people who seemed to just be visiting, this was the only area I found this was the case. So it shows that people find it desirable.
All of these photographs were in the yellow area, I feel that this may have been a bad judgement as the yellow area is so broad it doesn't take into account the small areas of beauty that you find in every area, instead just generalizing the whole area as mediocre. As you can see from the photographs there are some great examples of modern and older architecture in the area mixed in with the housing. One thing the area did lack however was a feeling of somewhere you'd like to visit, which I feel would put people off of visiting the area. Therefore people would probably bypass this area if they were going to visit Royal William Yard and the surrounding area or on the way to the continental ferry port.
The following pictures are all from the red area on the map. Whilst there was nothing in the area to stop people visiting, there is nothing to encorage them to come to the area, the area was simply an assortment of ugly low-rent factories and storage facilities. This area is clearly not for people to visit but it does seem strange for residents of the Royal William Yard, who are supposidly part of the upper weath bracket of Plymouth, pass through this area. This could put off potential buyers, a solution would be to put improve the image of the main street, Durnford Street, this would give the whole area a boost in my opinion maybe meaning people take the time to look around the rest of the area and find the hidden gems the the majority of people would normally never see.